That sounds almost a bit like Bell Book and Candle... Ah well..
I looked out and saw this, so grabbed a shot handheld.
HA predicted a nice flare , so I setup the SatCatcher. Having the tripod out, I grabbed a shot of the Moon and Venus aiming to capture some Earthshine.
Then, whilst grabbing a test shot, as the sky wasn't full dark, I was surprised to see a track within the image... Turns out it was Cosmos 1536
Then the flare, by this point, the sky was getting misty, so I'm quite pleased I caught it. I'm even more pleased that the stars showed in the shot.
And then, today, I was even more pleased. I got my new toy, just before the price rises...
An HEQ5. Sat on top, is the C80ED, and on top of that the Vista 80S. I had to put the other scope on top, so that I could balance the mount out, the camera makes it hard to balance. I have another dovetail that will fit on top of that, when I've adjusted it, making it all just that little bit firmer. Oh, and the finder won't stay on the Vista either.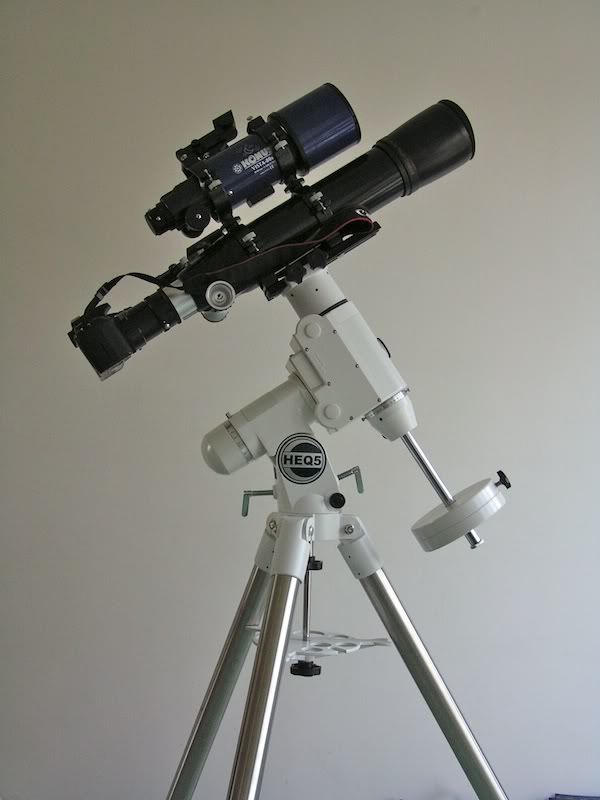
Friday 30 January 2009
Flare, Satellite, Luna, Venus and Toy
Sunday 25 January 2009
Double Flare with Double Planes
I spotted a double flare on HA and, given clear sky, setup the SatCatcher for it. I haven't used this in sometime, circumstances have meant the opportunity hasn't happened. Anyway, I caught both flares, even though they were very low in the west. This is close to the airport approach and departure paths so o chance of it being clear of aircraft. I got two of them. I'm not quite sure what's caused the large light spike, possibly internal lens reflections, I quite like it though and feel it adds something.
Afterwards the sky deteriorated fast so that within an hour Venus looked no brighter than Rigel. Ho hum again...
Saturday 24 January 2009
The ISS
Spotted an ISS pass prediction on HA and this was combined with a clear evening. Well who was I to say no to such an opportunity. I setup with the satcatcher, but ended up not using it. The ISS is too easy a target. Each pass is bright and clear.
I spotted that the pass was going to pass close to Venus, so too obvious to pass up..
Although it appears, thanks Shane, that I've also caught Uranus (a faint green trail just below Venus).
I swung around, as it looked like the pass was also going to go by the Pleiades. Unfortunatly I got this completely wrong and framed it badly, so didn't get the near miss (shame).
And finally, as the ISS passed through Gemini, I managed to catch it passing the foot of one of the twins. I appear to have caught 2 other satellites, Cosmos 2237 Rocket and one I can't find any details on. Also just to the right of the track, you can see M35.
I then had to go out, and when I got back, whilst the stars were visible, there was also a layer of mist that was causing odd effects with the stars, so didn't bother with anything else. Although I did point out a few stars and constellations to a visitor.
Wednesday 21 January 2009
M67 - A single lonley sub
I had this single frame I'd taken as a framing shot lying around from the other night before the weather put paid to anymore, so thought I'd do a little work on it and see how it looked. Considering it's just a single 30s frame at ISo1600, I think it's come out ok.
Tuesday 20 January 2009
M44 and some Bino viewing
After a day of heavy cloud and wind, the night came on, and the clouds cleared... What on earth (or in the heavens anyway) is going on. I had a meeting in the early evening, but was done by 9. Got home and setup. Levelled, powered up, alligned on Regulus, I can't believe Leo is climbing the sky already, used the goto to slew to M44 (a quick check with the RDF put it in just the right place) and setup for some imaging. Having set the timer remote running, I grabbed the 15x70's and found me a few M's and other targets. Firstly, M44 (what a great sight). Then I went to look for the Double cluster, and thanks to the change in orientation, it's all moved so fast... found a blob of light instead. That's odd thought I, that should be the double, scratching my head. Then took the bins away from my eyes and had another study of the stars... Ah, too low for the double, Mirfak is up there... Hmmm... that must be M31. Had another look, yep. Now I'd realised my mistake, it was clear. From there, up to Mirfak, and had a look at the association, then up the double cluster.
M45 was riding high in the sky, so I went onto there and had a good look around at this little nest of diamonds, lovely sight, and one I've not seen in quite some time. Orion, being prominent, was next, and in the 15x70's M42 was really rather a good sight. The shape was quite clear and pronounced. I had a little wander around in Monoceros trying to find the site of the Rosette, now I know I'm not going to see the Rosette in my bins, but there's a little cluster at it's heart and I found that quite easily.
Then I moved on up to Auriga, found the little fish, then onto Mr Smiley, M38 and the little NGC that marks his tear clearly visible. Then moved on down, following the M's M27, M36 and onto M35 in Gemini. Back to M44, and down a little to M67. An enjoyable M hunt, ok, less of a hunt, and more of a meander among known friends.
By this point, with my back aching again and getting cold, I header in, leaving the gear capturing data.
The rebalance of the scope has certainly helped, the drive train errors were gone. Now I'm finding another drawback. It appears that the longer focal length of the C80ED means that my subs have to be shorter before trailing sets in. Another niggle to work out, and more limits to test and work within... ho hum...
Anyway I captured about 35 light frames and lost half of them to trailing. Processing as normal in DSS with Darks, Flats and Flat Darks. Although I didn't frame it well, it's worked out nicely.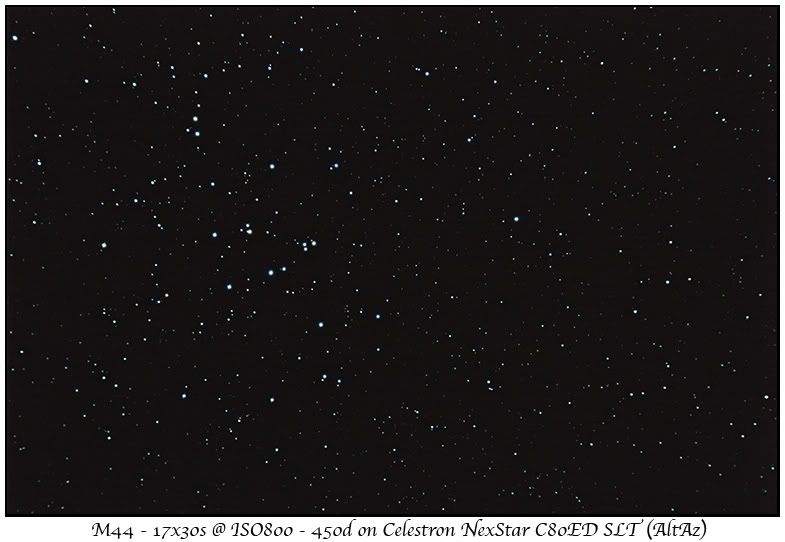
Having captured the data on M44, I slewed to M67, located and fired a couple of framing shots. Just got it centered and spotted a huge bank of cloud moving in from the west. I studied it for a few minutes to see what would happen and what direction it was moving, then packed up and came in. Good job too as within 30 minutes it was pouring with rain.
I plan to go back and capture some more data on M44 prehaps, starting earlier in the evening, if the weather will allow, maybe get some longer subs in and turn the camera into portrait. I'll also be having a go at M67 at some point.
Monday 19 January 2009
M35
Woohoo some clear skies. I almost didn't take the gear out as my back is still not good, but did anyway. After levelling, powering up, and carrying out a one star align on Castor, I slewed to M35. I tried this with goto but was out, I don't know why. Not a problem, I adjusted position manually. Oh, I should point out that I swapped my Celestron 6x30 finderscope for my Baader SkySurfer III. I got fed up with finding it so hard to ensure I had the finder on the right object. The long arm of the bracket also meant it was far more likely to get knocked and then it would need realigning. The RDF just works so well. Using the RDF, I can get my target lined up and it'll be in the FOV of most of my ep's straight off.
Anyway, I digress. Having received the 2" extension tube and the MaxDSLR 2" attachment fitting thingy (technical word there) I setup the camera, my new Skywatcher LP filter in the MaxDSLR, this should remove most of the vignetting. Set the time remote and got capturing. I captured some 40 subs, then as there was some cloud drifting through, darks, flats and flat darks. Meanwhile, whilst the darks were capturing, I'd slewed to M44. However, more thicker cloud moved in and covered the sky so I packed up and came in.
I downloaded the subs and started checking them. I ended up with only 7 usable 40s frames. The rest all showed drive errors. Then it hit me like a hurled brick. Having changed the fittings and the finder, the balance was now out again. The camera now sits further back and the extention tube is heavier than the 1.25" fittings I'd been using. Damn. Anyway, it's rebalanced now, I had to shift the scope forward about an inch.
After stacking the 7 subs, 13 darks, 15 flats and 15 dark flats (first time I've ever had fewer subs than correction frames....) in DSS I used a cube root stretch and boosted saturation. Then into PS for some more adjustments...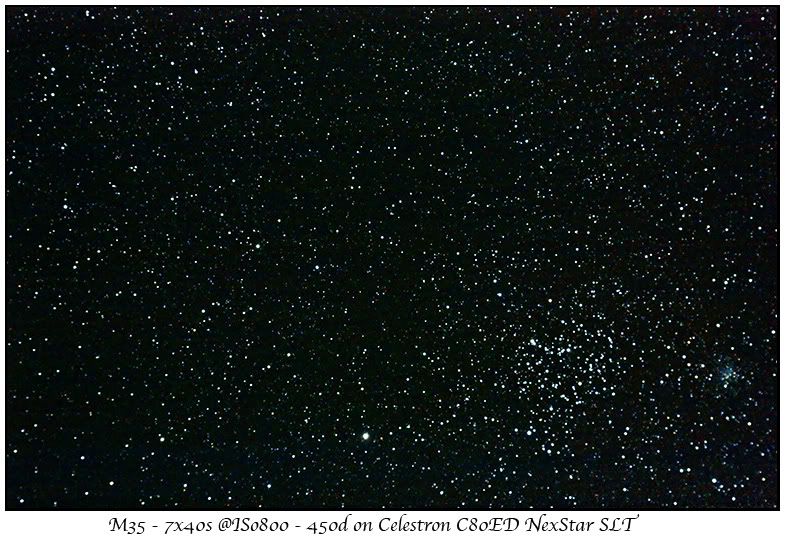
I'm pleased with the result, but disappointed at the amount of wastage... Ho hum.
Friday 16 January 2009
Lunar AVI reprocess and some news
I had another go at stacking one of my lunar AVI's from the other night, this time taking into account some of the advice I'd received from Squirreltape (AC), carefully selecting the reference frame, creating a reference stack and better wavelet settings. The image is a result of 150 or 520 frames, with a 44 frame reference stack, and a small saturation boost in final processing in Registax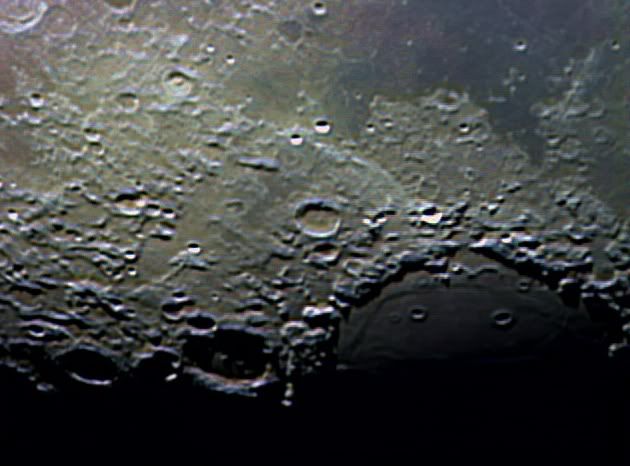
My copy of the latest Sky at Night arrived yesterday, and I've had another image on the cover disk. This time my M52 and Bubble nebula image.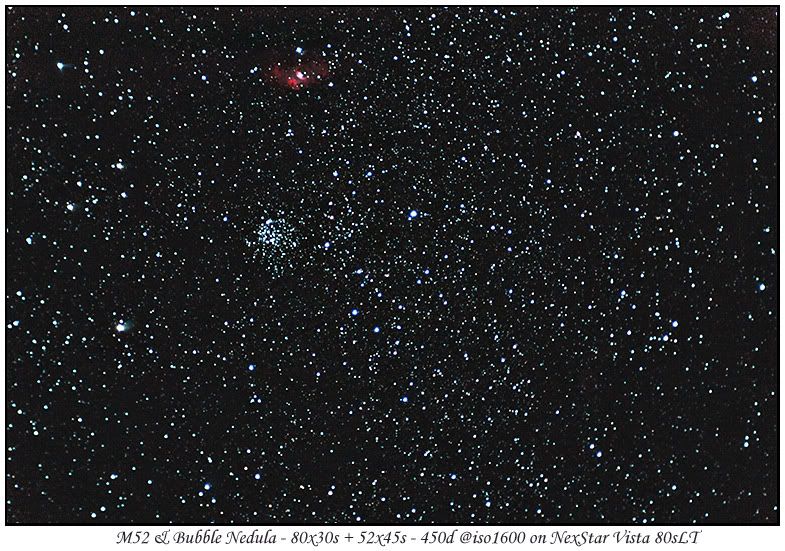
Yippee, although given the quality of a lot of images I see in the mag and on the cover disk, I don't think this is up to the same standard, but who am I to argue. Also, we are always our own worst critics.
Wednesday 14 January 2009
More Lunar Fun
A clear night for a change. This is grim. And the bad news, I have a sore back and shoulder. I got the gear out anyway, levelled, powered up aligned and moved onto the moon. After a quick look about with the 5mm Hyperion, I have to say, the seeing was really very poor, I decided to try out my adapter. So I attached the fittings to the Hyperion, ducked in and fitted the lump to the 450d, back out and in the diagonal, and focus was pretty close. The view in the camera viewfinder was pretty good, if wobbly. I used liveview to tweak focus and fired off a few shots..


I'm rather pleased with how they've come out, under better conditions, I'm sure the results would be better.
Then I hooked up the webcam for a quick bash with that. I used WcCtrl to control the webcam on this occasion, and whilst the controls are the same as WxAstroCapture, there are slots for saving 8 different groups of settings, so that'll make life easier. So, the first image is a single point alignment in Registax 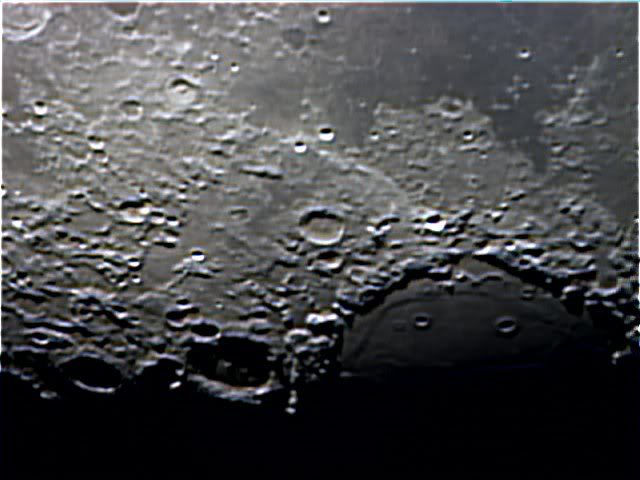
This is a multipoint alignment of the same input avi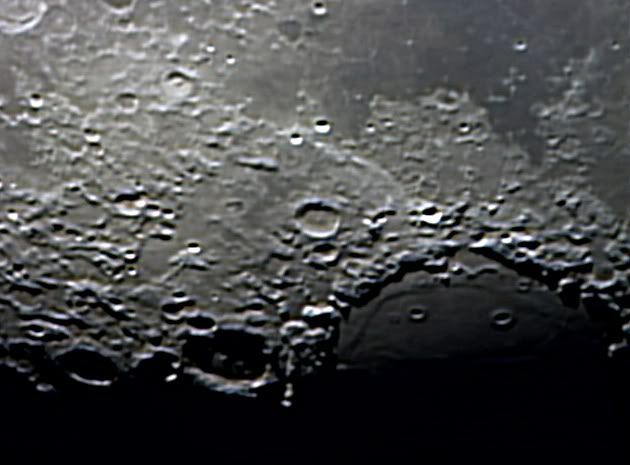
Then I used QcFocus to capture another AVI, this data is useable in AVIStack but I haven't got to grips with that as yet and keep crashing it. So I ran a multipoint Registax on it instead for now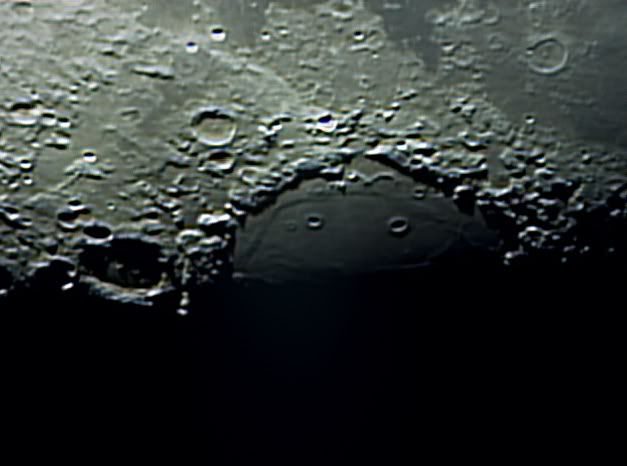
Each stack is about 450 of 500 frames. This is the first time I've had consistent results with Registax Multipoint alignment. I can only presume that the data is better in some way. The only thing I did do differently, was I patched the webcam back to the original settings, removing the raw mod, maybe this had a bearing I don't know.
Sunday 11 January 2009
Another moon shot
I had a few minutes the other night to try another moon shot. As I had only a short while, I used the camera tripod with the scope on it. Again using the 450d and 2xTC to capture the image.
It's not quite as crisp as the other night, but it was much lower down, and not having the fine control and tracking of the motors on the NexStar made focusing all the harder.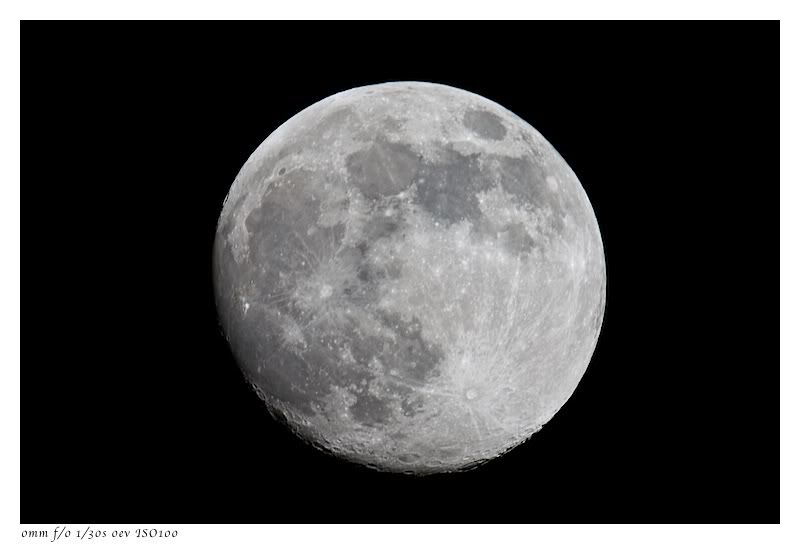
And then, because I can really, I pulled up the colour
I was eager to get out and try a little experiment with my new adapter. This allows me to mount the 450d directly on the top of a Hyperion eyepiece. I managed a very quick test and through the viewfinder the view looked good, but there was too much cloud around moving to quickly last night to attempt a picture, as I couldn't spend the time to get focus.
Friday 9 January 2009
Basic Widefield Astrophotography
I wrote up a tutorial on doing these earlier...
Ok I thought I'd write this up, as it's been discussed several times. So, here's a quick guide for getting started with Astro Photography. The full blown deep sky imaging requires a lot of expensive and heavy equipment to do properly, unless you're like me and make do with cheaper stuff and push it as hard as it'll take, and sometimes beyond, of course :D.
All you need for this is a Camera and a Tripod. I've done these with my Z2 and the 450d. The Z2 sensor is really too small and the ISO handling not good enough, but it works nonetheless.
You want to use a wideish lens. I typically use the 18mm end of the 450d kit. Set the lens aperture to wide open, forget about the sweet spot, you are looking to gather as much light as possible, if you want to get as many stars as possible in the end picture. Set the ISO to the highest you can, that the camera will be able to control the noise reasomably on, for the consumer Canon this appears to be ideal at 800. Set the Shutter to 30 seconds, this appears to give the ideal exposure time at 18mm, before star trailing becomes noticeable (it'll be there, but it's likely to be so small, you won't see it). Make sure you are set to shoot in RAW, then take at least 10 exposures at these settings, as the number of individual shots increases, the more detail you get, but... the more the resulting image will be affected by field rotation (appears as smearing in the top right and lower left corners). I'd recommend using mirror lockup and a remote or the camera self timer (I've used both).
Once you have captured the image frames (Lights), you need to then capture some Dark frames. These are exactly the same exposure settings, so 30 seconds at ISO800 in the same temperature conditions (don't take the camera in) but with the lens cap on. Go for 5. These are used in the stacking process to remove sensor noise and hot pixels. This is the equivalent of having in camera long exposure noise reduction turned on but allows you to spend more time capturing light frames, as the exposure time for each frame doubles if you turn it on in camera.
Load all the images, lights and darks into Deep Sky Stacker using the appropriate option when you load them in. These are called subs (or sub frames). Then click Register, taking the defaults and allow DSS to stack after registration. There are a lot of options in here, and it takes quite a bit of time to work them all out, but the defaults will get you going. Once the stack is finished, DSS will load the resulting file and it'll look possibly quite odd. This is DSS carrying out it's own algorithms to stretch the data and pull out the detail. This does work, but requires some playing around and experimenting, and to be honest, is not the easiest thing to do. So for now, save the image, and select the embed adjustments but don't apply option.
Load up the TIF in your editing package, and prefer for some fun... This is where things get tricky. You need to now use curves (or levels for those who don't have a curves tool, there's a filter for Elements Widows that provides curves) to stretch the histogram. You're looking to change it from an almost vertical bar on the left hand side to a broad shape.
This is the sort of thing you are looking to do (I'm not very experienced at this bit as yet, and it takes me a lot of messing to get to a result I'm happy with, I'm sure there are people here who'd be able to make a far better job of this step in much shorter time)...
But basically you are looking to apply curves something like these. Not necessarily in this order or severity, maybe stronger curves would work better, it depends on what details are in your image, but it gives the general idea. 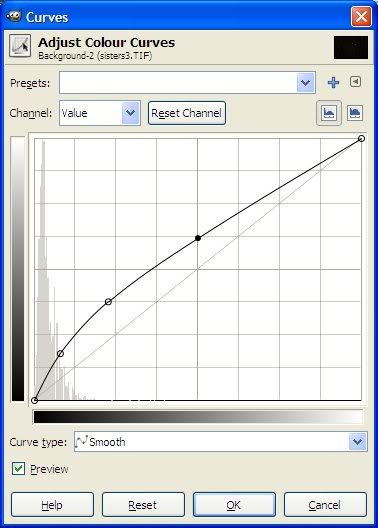
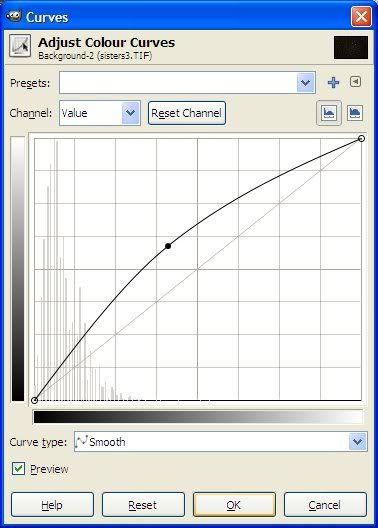
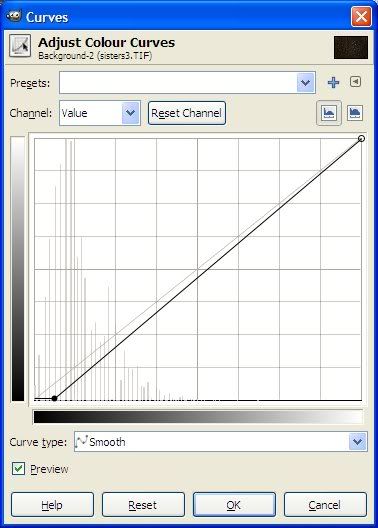

When you have finished this, you should get a reasonable resulting image. Here's a couple I did in exactly this way in August (the moon was down, and the skies were pretty dark).
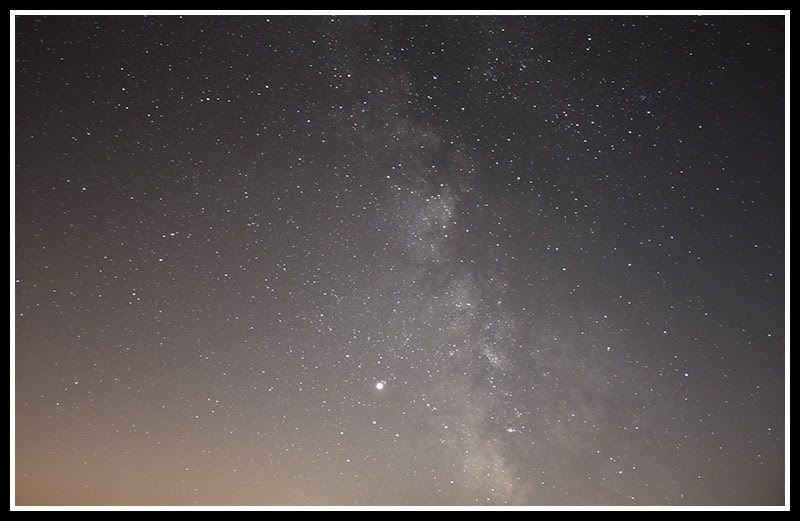
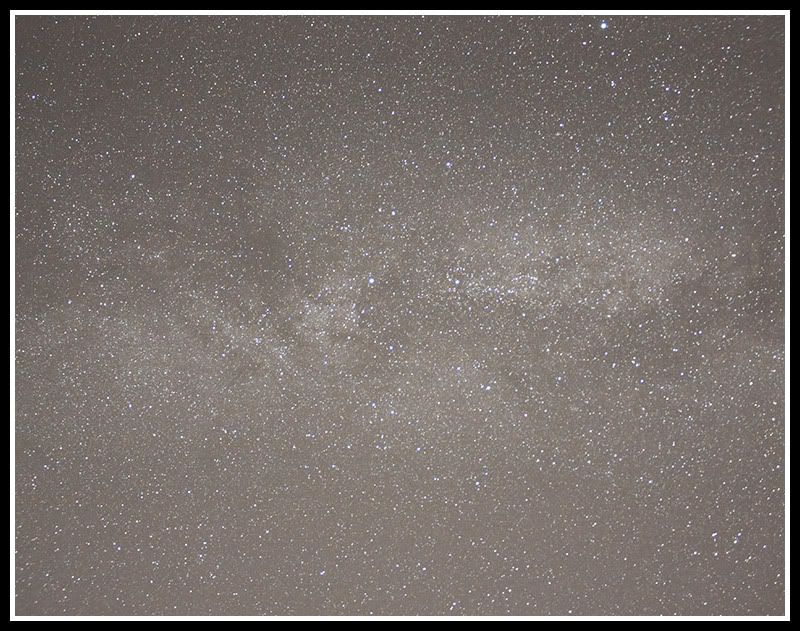
I hope this is helpful to someone.
A bit more lunar fun
What a strange day for the weather. The clouds came and went all day. I was able to grab a handheld shot, I thought I'd have a bash at something a little different, and tried to reverse the Earthrise shot, a bit daft... but hey
I had to pop out, and saw a wonderful Lunar corona in the clouds, but didn't have my camera or tripod with me to try and capture it. Anyway, the sky cleared away after that, and had a look at a couple of constellations with the eldest. Orion, Taurus and Gemini (he'd been asking me about them). So after getting home, I popped the C80ED on the tripod, grabbed the camera and TC and dashed out, to find the sky covered in clouds, can't have been more than 10 minutes later.
Time Passes ...
About an hour after that, I poked my head out and again the sky was clear. So I popped the C80ED on the tripod and tried again. This time capturing the moon at 1200mm (F15)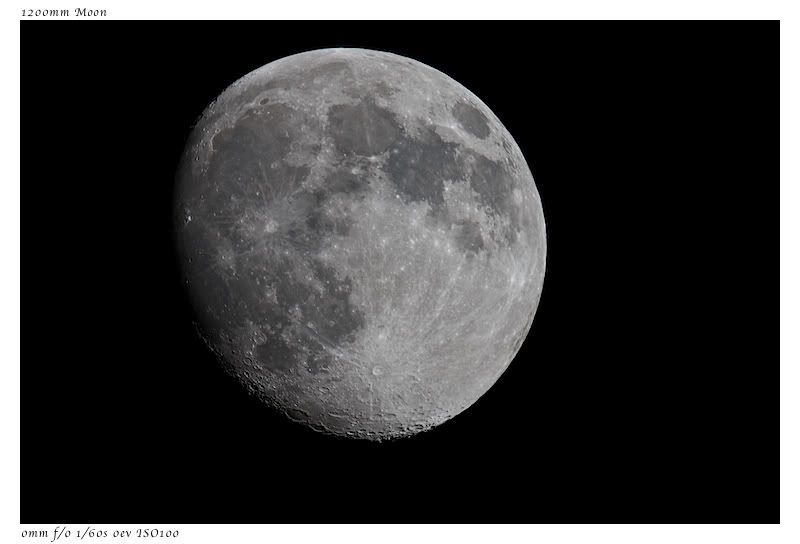
I had planned to setup the scope and try and sort out using the webcam for lunar capturing, but this was not to be, as by the time all was quiet, the fog had rolled in. The effect of the moon through the fog was quite astonishing, but the camera couldn't capture it, I've tried a few things, but no joy so far.
So instead, I had a play with my earlier image, popping the colour
Then cropping in to see what that would look like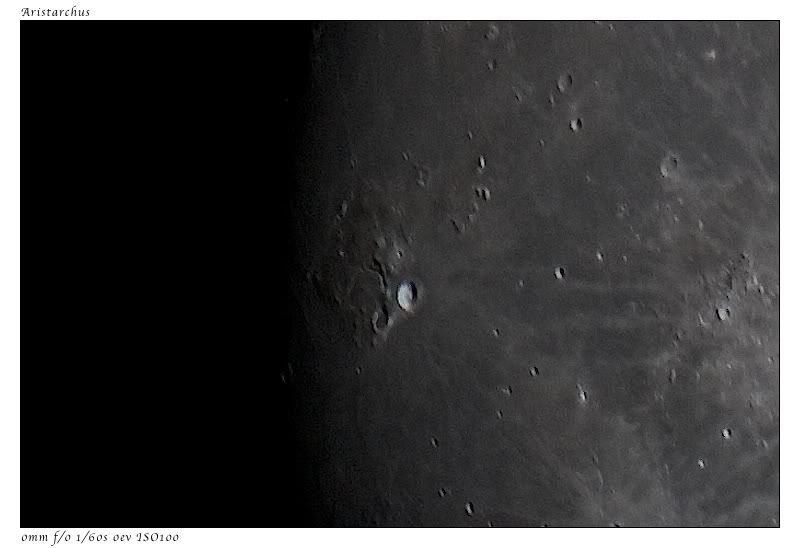
I have to say that for crops from a single SLR image, they are better than my attempts at using the webcam to date...
Wednesday 7 January 2009
First view of Venus
I forgot to mention in my earlier post, I got my first view of Venus through the scope last night too. Not much to write home about, but that's not really a big surprise. Still I could clearly see the phase. I had a bash at it with the x10 lashup I was going to use on the moon anyway...
Getting silly with the Moon
Got a little while after work out under the stars (well the bright moon really) last night. I continued my play test with silly magnifications just to see what would happen with single exposures from the 450d. However, I grabbed a couple of 55-250 shots to start with just to get something in the can.
One from during the day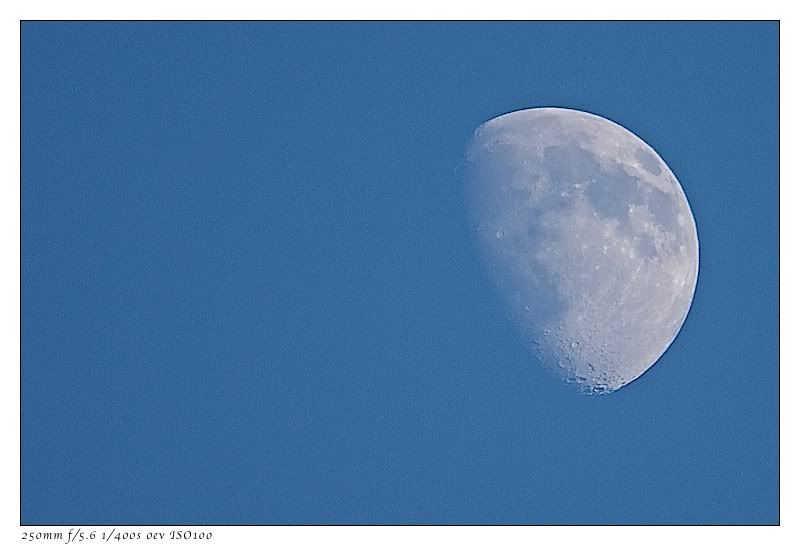
And one from after dark
Then I started cranking in the barlows..
This was shot with the 5x barlow and the 2xTC, focus was tough, but I got it a bit better than before.
As I was mucking around, I threw in the 2x Tal barlow as well.. Focus was nigh on impossible, breathing within 5m of the scope or mount made the view wobble about like a jelly on a trampoline.. But I got an image for my troubles, ok it's not very good.
Then having satisfied my curiosity and decided that getting that config to work was just to much like overly hard work, I settled back to just the 2xTC
Then popped the colour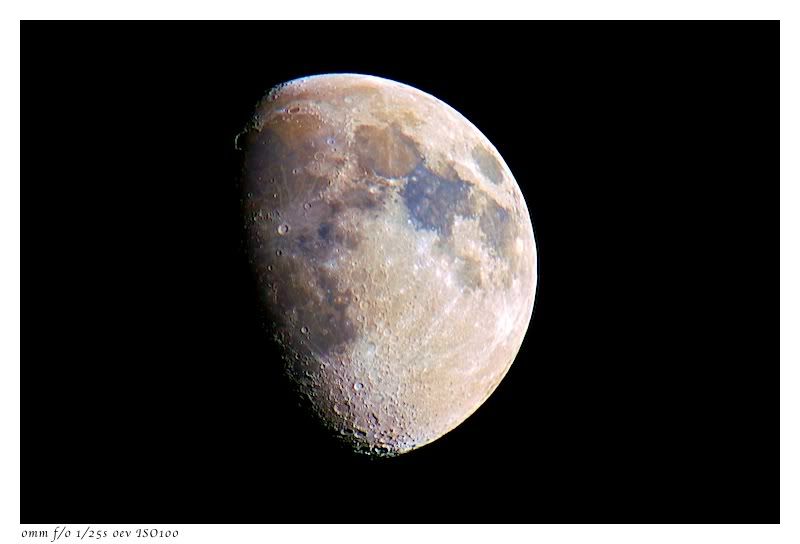
Then, being done with the camera, I assembled for a short visual session, to show a relative the moon at about 200x. The view was amazing, if a little wobbly, and he couldn't believe how much detail there was to see. By this point, in spite of wearing three fleeces a coat boots, hat etc (having been out for all of 30 minutes), my toes felt like they were ready to drop off, so I packed up. After dinner, rather than go back out again, it had got colder. I headed for the pub but on the brisk walk there, pointed out a few of the constellations and sights to my friends.
Tuesday 6 January 2009
The Moon and an outing
I went out last night to a visit to the Adur Astro Society. I got out before hand and grabbed a shot of the moon with the 55-250
Then attended the meeting. A very interesting meeting, with a review of good and interesting visual and photographic targets for the month. There's a couple of good clusters coming up, positioned nicely for me to image and I shall have a go at these when I can. I then had a chance to show a few of my images and the SatCatcher which went down well. There was some astonishment at how effective something so simple and crude could be, and I think there will be a few more made soon.
When I got home, I was tempted to get the scope out and try and setup the silly experiment from the Lunar X, pushing the mag to silly levels with the 450d, but it was too damn cold and I couldn't be doing with it. So I settled for a normal shot with the 55-250 instead.
Saturday 3 January 2009
Lunar X
A challenge was set on AC, that given the Satellite images were showing clear of cloud here, that I see if I couldn't capture the Lunar X (Also known as the Purbach X). I grabbed all my gear, as this was the first time I'd actually had an opportunity to see this odd surface detail as it's only visible as an X for about 1 hour a month, and to date it's always been cloudy.
I went out to check, and yep, very clear and crisp, and I saw a fast moving satellite shoot across the sky, heading west to east. It wasn't bright enough, and appeared to have been too fast for the ISS, besides there are no visible passes predicted. Checking HA, it appears to have been Lacrosse 3.
I went in and grabbed the gear. Levelled, aligned on the moon, dropped in the 5mm Hyperion, and the Lunar X leapt off the surface. I couldn't believe how easy it was to spot, I'd been expecting to spend a while hunting for it. I'd been planning a session with the SPC900, but didn't really have time, so just put the 450d at prime and had a play.
At 600mm, no sign of the X
However, adding in the 2xTC, and the X becomes clear or at least findable
I then figured, what the hell, I needed to get closer to make this work, so I put Tal 2x barlow inline, after struggling with focus, I popped the diagonal back in, although I'm never too keen on doing this, something about the precarious perch of the SLR on top of the diagonal, but the X shows up really rather well.
I then threw caution to the wind, and decided to just go for it, replacing the Tal x2 with the Antares x5 barlow. This was a bit tricky to focus and I didn't quite nail it, the tiniest motions, from breathing near the focus knobs for instance, are amplified to a silly degree, but in spite of that it worked, the X is clear even if the focus isn't spot on.
Given that these are all single frame exposures, and there has been no stacking, I'm really rather pleased with the results. I think to improve the last one, I'd need to replace the Celestron rack and pinion, single speed with a double speed Crayford and a motor focuser. This may happen in time.
I had wanted to get back out there later this evening and have a go at M42. However, it's damn cold, my back hurts, and Orion was too high and south by the time I could have got out, what with some high level clouds appearing to be moving in, I decided to give it a miss and have a beer instead.
Lunchtime Lunar Experiment
The sky was clear at lunchtime again today, so I decided to make the most of the oppo of seeing the moon and try a little experiment. I used my new Redsnapper tripod to mount first the scopes in turn and took a series of shots to show the different scale at various focal lengths using the 450d. Including the 55-250, this ranged from 250mm to 1200mm.
Using the Konus Vista
The C80ED
The Vista again
And finally back to the C80ED
The only variation on the scopes was the fitting of a 2xTC to increase the focal length. I had been hoping to check and see how the TC really compared for IQ, but there wasn't enough contrast to work it out.


